Tuesday, September 30, 2014

No cook/bake Chocolate and Coconut Truffles

No cook or bake Chocolate and Coconut Balls


 Since the festive season arrives I am trying to do all sort of simple and easy sweets and desserts these days. One of such experiment I tried today was these easy and prepared with only 3 ingredients Chocolate and Coconut Ladoos.

It is as easy as just mix, shape and done.. Before you could even think these yummy chocolate and coconut fudge will be ready to enjoy.

So please note the ingredients And method of these gooey and fudgy chocolate balls...:)

Ingredients
- 1/2 cup sweetened condensed milk
- 150 grams desiccated coconut powder
- approx. 150 grams milk/ dark or white chocolate

Process
1. On a double boiler melt the chocolate
2. In a bowl, add condensed milk
3. Add coconut powder ( keep 2 tbsp of coconut powder aside)
4. Add melted chocolate to this mix
5. Mix them well using a spatula or your hand.
6. Freeze this mix for minimum 2 hours
7. Once done, take small portions of this mix and make small roundels
8.  Now, dust/coat these balls in coconut powder.

And that's it, your easiest dessert is ready to be served... :)


Monday, September 29, 2014

Eggless Blue Velvet Cake

Eggless Blue Velvet Cake


I am taking my Bluey  beauty to Angie' Fiesta Friday Co hosted by Prudy and Naina

I was planning to make this amazing beauty from very long but wasn't getting good quality food colour to execute my dream.
When my birthday came around and I to.d hubby my desire to make this, he searched and searched and finally got me perfect food colour to make this.

This is an eggless version of blue velvet cake frosted with cream cheese frosting. It was my first attempt of cream cheese frosting and thankfully everything went well and the came came awesome, else it would been a disaster on my birthday as I strictly asked hubby not get get a cake for. Store..:D

Once the cake was completed, I was thinking and thinking and thinking of what to do special to decorate the cake then, this thought of making spider swirls came to my mind. And Voila!!!! See what I made...:)

Ingredients
- 1 cup plain flour
- 1/4 cup castor sugar
- 1/2 cup sweetened condensed milk
- 1 tsp. baking soda
- 1 tsp. baking powder
- 1 tbs unsweetened cocoa powder
- a pinch of salt
- 1 tbsp vanilla essence
- 1/2 cup milk
- little more than 1/4 cup softened unsalted butter
- good quality blue food colour ( I prefer using liquid one)

Process
1. Pre heat the oven at 180 degrees for min. 10 minutes
2. Take a bowl, add butter and sugar and beat them together till light and fluffy
3. Add condensed milk and beat till a homogeneous mix Is formed
4. Add vanilla and mix well.5. In a. Sewerage bowl, sieve together flour, baking soda, Baking powder and cocoa at least 2 times.
5. Once done add half of the milk to the butter and sugar mix and half of the flour mix and mix well.
6. Once done, add the food colour to the milk and stir well. You can add colour until a desired colour is achieved.
7. Now add remaining milk ( with colour) to the batter along with second bath of flour and mix everything well.
8. Once done, pour the batter in a greased and floured 7" baking pan.
9. Bake in pre heated oven for 35 + minutes or till the toothpick comes clean.
10. Once done, let the cake cool completely before you move forward to work on icing on the cake.

Ingredients for butter cream icing
- 3/4 pack of creamer cheese ( I used a pack that had 180 grams in complete pack)
- 1/2 cup unsalted butter
- 1 cup icing sugar
- 1.5 tsp vanilla essence

Process
1. Take a bowl and softened butter and beat on medium speed for a minute.
2. Add 1/4 cup of icing sugar and beat on medium speed for 2-3 minutes, after this process you will see peaks in the frosting
3. Now add another 1/2 cup icing sugar and now beat on high speed for another 2-3 minutes.
4. Add last bath of icing sugar along with vanilla and beat for another 1 minutes.
5. Now, add the cream cheese and on high speed beat the mix for 2 minutes.
6. Now, you frosting is ready to use, just freeze for 15 minutes before use.

Assembling of cake
Things needed
- sponge cake
- rotating table or a boy plate it on a medium sized bowl
- frosting
- sugar syrup ( 2 tbsp of ice cold water and 2 tbsp if icing sugar dissolved together)
- a plate
- a serrated long knife
- a flat knife or spatula
- a cake board

Process
1. Take the cake on a plate and slice into 3 using knife.
2. Know take one of the slices on rotating table and apply sugar syrup
3. Take a dollop of frosting and spread evenly with the help of spatula.
4. Place 2nd slice and repeat the process
5. Place 3rd slice and now do a crumb coat / rough coat to the cake. Here you need to roughly cover the entire cake with frosting using the spatula.
6. After the crumb coat freeze the cake for at least 20 minutes.
7. Now take generous amount of frosting and smoothen the cake from all the sides and top. 
8. Now, decorate as you desire.

Your smurfy blue beauty is ready...:) :)


Wednesday, September 24, 2014

Davi Vada

Dahi Vada 


dahi Vada is a typical street food that comprises chat in norther India. It's made of black washed gram/ white Urad dal and soaked in curd and some other sweet and tangy dips and chutney along with spices.

I have never liked dahi vada, until my recent trip to delhi. Where I tasted them at my cousin's place and they where just irresistible. Super soft and yummy... Since then I have been craving them, so thought of trying them myself.

This was my first attempt on them and fortunately, by god's grace they came perfect.

Sharing this recipe, which is originally my mom's recipe..:)

Ingridients
- 3/4 cup White split white Urad DSL
- 1/2 cup washed split moong dal
- pinch of hing/asoferida
- 1 tsp of cumin seeds
- salt to taste
- oil for deep frying
- 1 litre curd
- 1.5 tbsp of sugar
- sweet and tangy chutney/ saunth
- degi mirch for garnishing
- cumin powder for garnishing
- chat masal for garnishing
- pomegranate for garnishing
- freshly chopped coriander for garnishing
- few ginger juliens for garnishing

Process
1. In a big bowl take both the lentils together and wash them nicely.
2. I. Fresh drinking water soak them overnight.
3. In the morning drain the excess water from the lentils.
4. Put them jar along with hing and cumin seeds, ansh bring them in a
Not so smooth paste.
5. Now, take this mix out in a big bowl and add salt.
6. Now with a big spoon or with your hand beat the lentil paste for good 10 minutes. This process areate the mix which makes the vadas soft and fluffy. 
7. To check whether the lentil mix is beated enough, take drinking water in small bowl and with small spoon add little mix to the water. If the mix floats, this means it's aerated enough and is good to go.
8. Now, in hot oil take spoon fool of lentil mix and leave in oil with the help of spoon itself. 
9. Cook them till nice golden on medium flame.
10. Once done, take them out on a player towel.
11. Now, soak them in salted water for minimum 15 minutes.
12. In a separate bowl take curd add sugar and beat with a whisk till sugar dissolves.
13. To serve, take serving dish out vada ( ensure to squeeze extra water). 
 14. Top vadas with generous amount on curd, some sweet and tangy chutney, sprinkle some cumin powder, Peprika, chat masala, pomegranate, Ginger juliens and chopped coriander.

Your plateful of yummy and melt in mouth Dahi Vadas are ready to enjoy...:)


Saturday, September 20, 2014

Whole Wheat Onion and Sesame salty crackers


I love salty cracker, so much and so that  I can not have my evening cup of coffee without them. I have made lots of sweet cookies, and ever since then have been getting requests for masala/salty crackers.

Today tried my hand on these tyummy, crispy yet healthy cracker with flavours of onion and fenugreek. Very simple recipe yet yummy crackers...

Ingredients
- 1 cup whole wheat flour
- 2 tbsp oil 
- 1 finely chopped onion
- 1 tbsp sesame seeds
- salt to taste
- 1 tbsp dried fenugreek seeds
- 1 tsp carom seeds- tsp cumin seeds
- 1/2 cup water to knead the dough
- 1 tbsp thick curd


Process
In a bowl take flour, add 1 tbsp of oil, curd, salt, cumin, carom and fenugreek to the flour and mix them all really well. Once done add chopped onion and using very little water make a firm dough. Once done let the dough rest for at least 10 minutes.
Now roll the dough and with the help of cookie cutter cut them in desired shape. And bake on preheated oven at 200 degrees for 20+ minutes! or till nice golden brown.


Thursday, September 18, 2014

Eggless Whole Wheat Carrot Cake

Eggless  Whole Wheat Carrot Cake


Carrot cake is something that I was planning to bake from very long. Today when I planned to bake some tea cake, I thought of fulfilling my bake crave for carrot cake. Today everything was favouring me to do it, I had lots of carrots in my fridge along with other ingredients. And when I told Amit ( hubby) on my wish of making a carrot cake he too was keen on looking at the results, so curiosity increased all the more.

Then another thought came to my my mind of making a whole wheat cake instead of using plain flour/ APF. As my apple cake with whole wheat flour was a super hit thought of trying similar process for carrot cake too. 

So started the cake bake preparation, and to my surprise cake came absolutely gorgeous, super moist and yummy too.

Sharing my experience of an eggless whole wheat cake with all my foodie friends. This is especially for all those mums who wants to give best snack to their kids. This cake is good source of iron, vitamin A, it's naturally sweet and with wholesome dietary fibre too. And, wheat again with whole some fibre and nutrients value adds to the yummy and healthy snacking...:) <3

Ingredients
- 1 cup whole wheat flour ( I used multigrain flour)
- 1/4 cup vegetable oil ( I used canola oil)
- 1/2 cup milk ( room tempratured )
- 1.5 tsp baking powder
- 1 tsp baking soda
- 1.5 tsp vanilla essence
- 1 tsp cinnamon powder
- 1/2 cup castor sugar and brown sugar together
- 1 cup washed,pealed and grated carrots
 - 8 inch loaf pan greased with oil and dusted with flour.

Process
1. In a bowl mix oil,milk and sugar together.
2. Beat them together till sugar is dissolved completely.
3. In A separate bowl take flour,baking powder,baking soda and cinnamon powder together.
4. Sieve all the dry ingredients at least twice.
5. Now add vanilla to the oil mix.
6. Once done, add the flour mix to the oil mix and mix everything well to form a nice homogeneous mixture.
7. Now, add carrot to the cake batter and with a silicon spatula mix it well.
* At nth is stage you can add raisins and walnuts if you want.
8. Pour the cake batter in the cake tin. And bake in a pre heated oven at 200 degrees C for 35 minutes or till the tooth pick comes clean.
9. Let the cake cool for a while, remould the cake and slice it.


Your yummy and healthy carrot cake is ready to enjoy with a cup of tea, coffee or just like that...:)


Wednesday, September 17, 2014

3 ingredients yummy Malai Ladoos

Malai ladoos


Malai ladoos are very famous Indian sweet in Northern India especially in States like UP. In traditional way it is prepared by evaporization process of sweetened milk.
Since the tradition way of preparing these ladoos is very lengthy there is a shortcut of preparing. Them using sweetened condensed milk and cottage cheese/paneer.

I have tried my hands on these ladoos quite a few time now, and they are always a hit with family. 
This time I tried my hands on these ladoos with a hint of natural and edible rose water. This gave an absolutely refreshing fragrance and taste to the ladoos adding that extra kick to them...:)

Please note the ingredients and process of the ladoos

Preparation time - almost 20 minutes
No. Of ladoos as result- close to 12

Ingredients
- 1/2 cup sweetened condensed milk
- 200 grams coarsely crumbled paneer/ cottage cheese
- 1 tsp. good quality edible rose water

For garnishing
- few pinch of cardamom powder
- few pistachio flakes
- few strands of saffron

* garnishing is optional and not mandatory

Process
1. On work surface take panner and with the help of base of your palm, knead till nice creamy texture.
2. Add paneer to the pan ad add condensed milk to it.
3. On low flame, cook this till the mixture losses edges.
4. Noce done, add rose water and give it a good mix.
5. Once done, let the mixture cool.
6. Once cooled to room temprature, take handful of the mixture and shape them in balls.
7. Garnish with cardamom powder/pista flames and saffron strands.

You yummy malai ladoos are ready to be indulged in..:) :)


Tuesday, September 16, 2014

Eggless Double Chocolate Kit Kat Cake

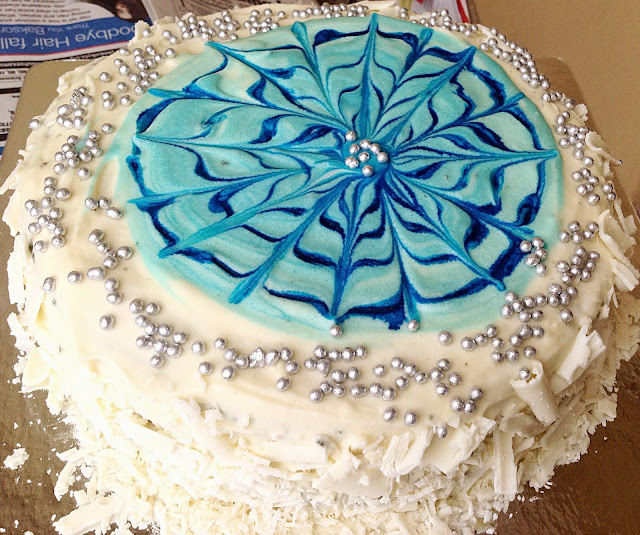
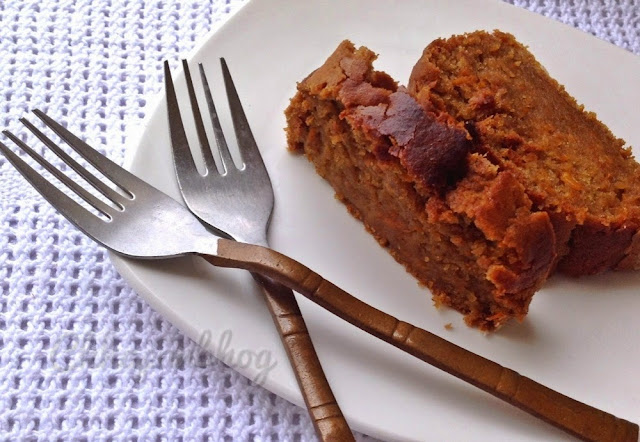
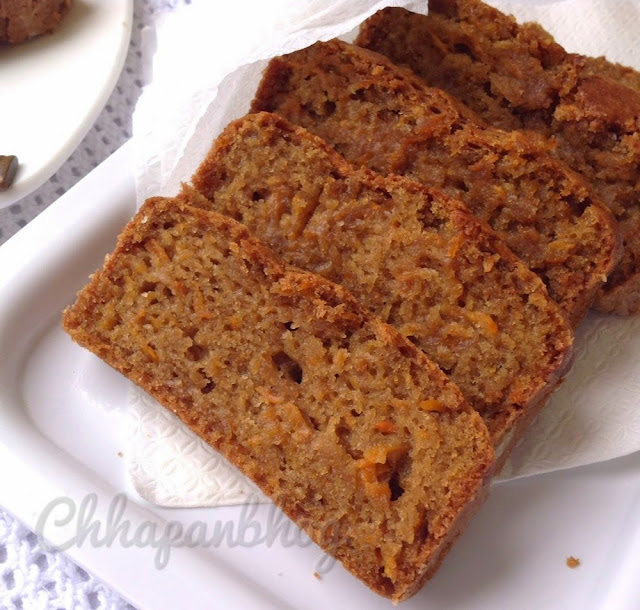
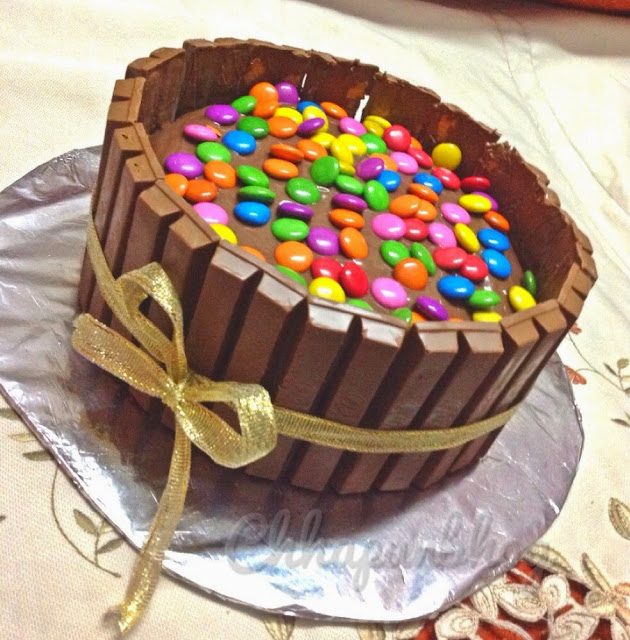
Eggless Chocolate cake


Who wouldn't love chocolate cake.. I know there are peeps who don't like chocolate at all, but I am talking about spate of mass.:D

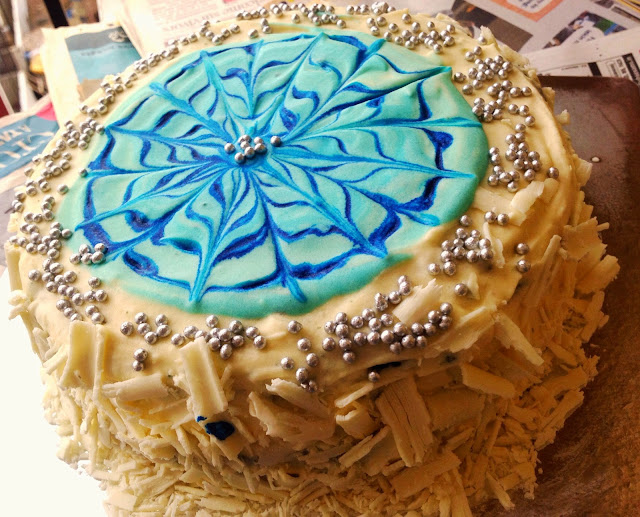
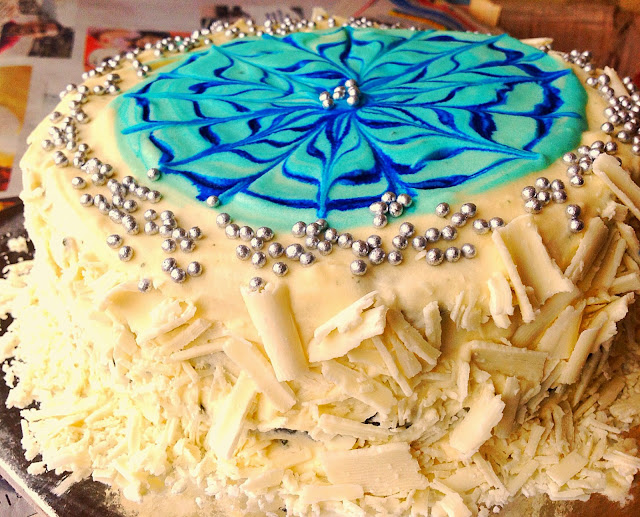
I prepare this cake for my brother's birthday. This was first time since I started cooking I was baking a cake for my brother and parents, was little apprehensive of the results.,but to my surprise not only the cake came perfect but the way I planned to decorate it, also turned out super awesome... It's was my eureka moment when I told my brother that we got the cake from a store and he agreed to it...<3 when we revealed the cake is homemade he couldn't just believe me..:)

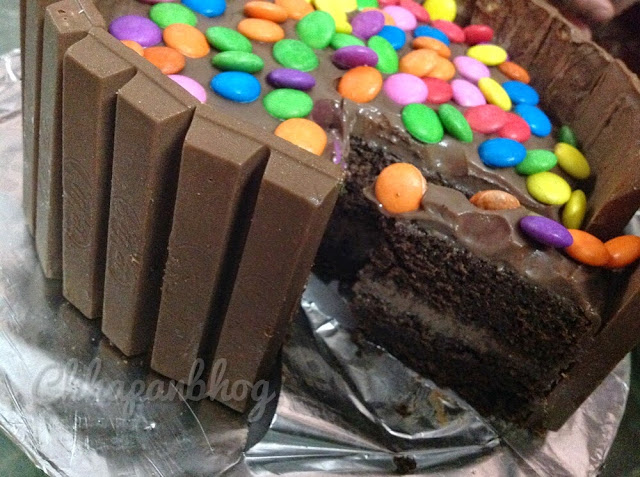
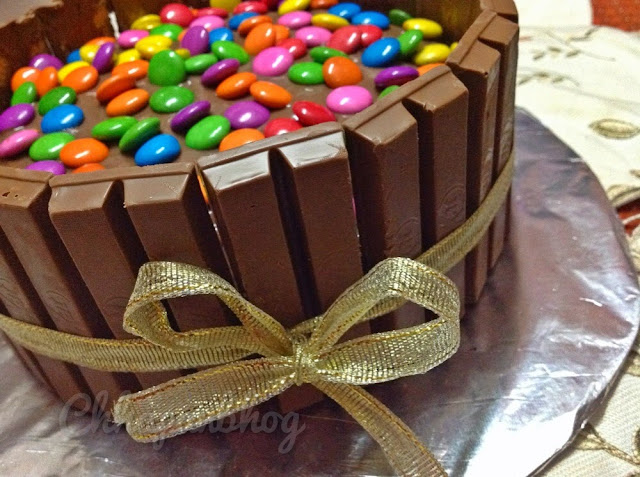
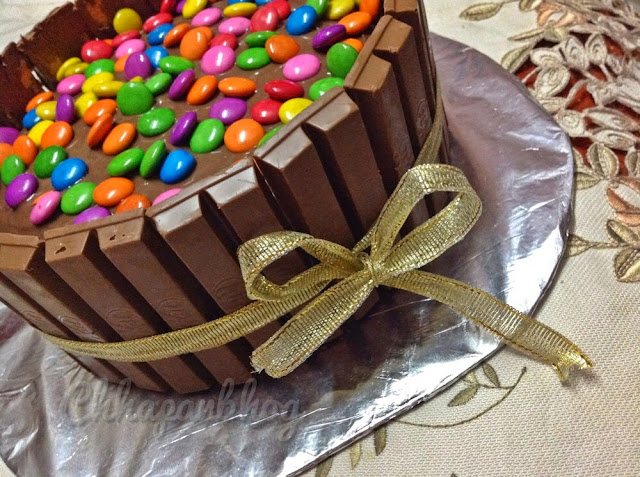
So this is super hit cake I made filled and topped with chocolate ganache ( very easy process for chocolate ganache). Decorated with kit kat bars and gems ( you can use M&Ms too). This is gonna be your kid's favourite cake once then see it.

As it's an eggless cake, I had no complains with its texture, sweetness or taste. Was just a perfect chocolate cake.

Ingredients
 For cake
- 1 cup plain flour/maida
- 1/4 cup coco powder
- 1/2 cup sweetened condensed milk
- 1/4 cup icing sugar
- 1/4 cup oil ( I used sunflower oil)
- 1 tsp baking powder
- 1/2 tsp baking soda
- 1/2 cup milk
- 1 tsp Vanilla essence
- 1/2 tsp instant coffee powder

Process
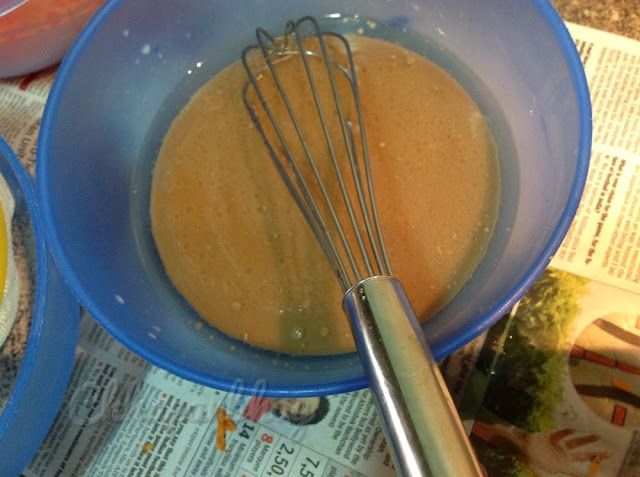
1. Take a bowl add oil and icing sugar and mix them really well to form a smooth mixture.
2. To this add condensed milk and mix well wit the help of a whisk.http://thenovicegardener.files.wordpress.com/2014/03/fiesta-friday-badge-button-i-party.jpg&#8221
3. In a separate bowl take a colander and sieve together flour, coco,baking powder, baking soda and coffee.
4. Sieve this flour mix at least twice ( as this is an eggless preparation, this will aerate the flour and help rise the cake for perfect texture)
5. Add half of the milk and half of the flour mix to oil mix and beat well.
6. Add rest of the milk and flour mix and mix well. At this point do not over beat the mixture, just mix all the ingredients well.
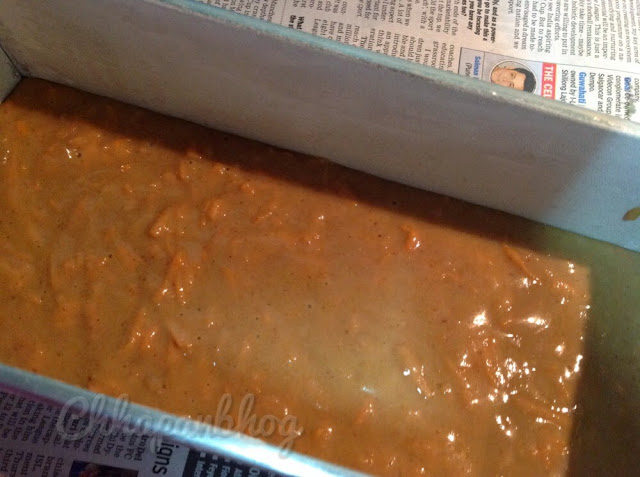
7. Take an 8 inch baking pan, grease from all the sides and sprinkle some flour all over.
8. Pour the cake batter in greased pan and give it nice tap.
9. Bake the cake in a ore heated oven at 180 degrees for 35 minutes or till a tooth pick comes clean.
10. Once done, let the cake cool and demolish the cake.
 Your chocolate sponge cake is ready...:)

Chocolate ganache

Ingredients
- 1/2 cup heavy fat fresh cream
- 200 grams of cooking/ baking Chocolate( I used combination of milk and dark compound)
- 1/2 tsp. unsalted butter
- A pinch of salt

Process
1. In a pan on medium flame, heat the cream. It should not boil, turn off the flame just before it comes to a boil.
2. Once done, add chopped chocolate to warm cream.
3. Let the cream and chocolate rest for minimum 5 minutes.
4. Now, give it a good stir, with the heat of cream chocolate will melt.
5. A smooth and creamy mixture if cream and chocolate will b formed.
6. Add butter and salt and give it a nice stir.
7. That's it, your east chocolate ganache is ready to go on your cake..:)

Glaze your cake with ganache and decorate your cake with kit kat bars and gems. Your perfect chocolate cake is ready for any occasion...:):)


Kesar Rasgullas or Rajbhog

Kesar Rasgullas


Rasgullas is an Indian Dessert also known as Roshagulla. It comes from vibrant Bengali / eastern family    Of desserts. It's yummy and healthiest Indian dessert as there is no frying required for preparing this sweet. It as also known king of Indian sweets. A perfect rasgullas is very soft, smooth, spongy and it's melt in mouth taste and texture will leave you speechless...:)

Process of preparing rasgullas is a little tricky task, but then as we say practice makes you perfect. This was my third attempt at rasgullas and trust me it's easier than any other spdessert preparation. It's just that there needs to be certain precautions taken.

So first I'll run through the ingredients and process and preparing them and then will share few tips to avoid any failure...:)

Ingredients:

Milk - 1 litre
Lemon juice - 1 to 2 tbsp. 
Corn Flour - 1/2 tsp.
Sooji- 1/2 tsp.
Sugar - 1.5 cups
Water - 3-4 cups
Cardamom powder - a pinch
Pista flakes and saffron strands for filling
Saffron, and pista/ almonds for garnishing

Method :

1. Heat milk, bring it to boil and simmer it. 
2. Take the milk off flame and let it cool a little for 3-4 minutes.
3. Add lemon juice and stir slowly. 
4. When milk starts curdling, stop adding the lemon juice further and keep stirring very slowly.
5. Take a muslin cloth and pour the curdled milk, filtering the whey water completely. Wash it well in running cold water. 
6. Now, let the water drain out naturally without squeezing, for this in a muslin cloth hang the paneer for at least an hour.
7. Take the paneer on a clean surface and knead with back of your palm for at least 5 minutes. Here please ensure not to over knead the paneer as it should not leave fat.
8. Now, add corn flour , sooji and knead it well for another 2-3 minutes.
9. Make small balls out of it, ensuring there are no cracks.
10. Stuffing of pista flakes and saffron strands is optional. While making balls press the paneer balls between ur palm, keep required Amt. Of pista flakes and saffron and them make them in small balls with no cracks.
11. Heat water in pressure pan, add sugar, cardamom powder and few saffron strands for yellow colour. 
12.Keep stirring till sugar dissolves completely. 
13.When the sugar syrup boils, add the paneer balls one by one.
14. Pressure cook for one whistle and simmer it for 5 minutes by th clock.
15. Once the pressure goes off, open the lid and check if the balls have cooked well, and then close the lid for even better results and wait till the pressure pain comes till room temp.
16.The yummy kesar rosgullas are ready to enjoy.. To enjoy them at their best, put them in fridge fore couple of hours.


Note : I used 5 litre pressure pan to make rasgullas

Tips
- For best results, start with best milk. I,e. Used tonned milk only preferably cow's milk
- while curdling the milk, don't add the lemon juice while milk is still bolting on gas, this will make your Rasgullas chewy
- Your milk should curdle in big lumps of paneer, if the paneer lumps are too small, the Rasgullas might be at risk in the later stage.
- For perfect texture of rasgullas. Do not over drain the water from paneer else the rasgullas will be my too dry.
- While kneading be very cautious as excess and deficit if th kneading will not lead to perfect textured rasgullas.
- while shaping them, ensure there are no cracks
- While putting them in Preassure pan, ensure don't over crowd them. Else while they are boiling they will heat each other and loose their shape.


Monday, September 15, 2014

Elaichi Shrikhand

Elaichi Shrikhand


Shrikhand is an Indian sweet dish made of strained yogurt.[1] It is one of the main desserts in Gujarati cuisine and Maharashtrian cuisine. Preparation of this dish is very simple but it takes some time to process yogurt properly.

To prepare shrikhand, yogurt is tied in a cotton cloth and left under pressure to drain. In the past, it used to be hung from a wall to achieve the desired thickness. Cardamomsaffron, and any other flavors are then added and mixed. It is then left in the refrigerator for the sugar to dissolve. The dish is served chilled.

Info. Source wiki..:D

I have been planning to make this dessert from very long, as hubby dear loved this. Yesterday when I had spare curd I knew where to use it..:p

Ingredients

-500 gram curd ( hung in a muslin cloth for minimum 4 hours) 

- 2.5 tbsp so icing sugar

- a pinch so cardamom powder

Process

1. Take a bowl add hung curd and sugar

2. Whip them together with hand beater for a minute or so.

3. Ensure not to overwhip/ mix. You will know when your shrikhand is ready once you see nice creamy and smooth mix.

4. Mix cardamom powder to the shrikhand.

Your yummy and creamy elaichi shrikhand is ready to enjoy...:) :)